Filesystem-native task tracker for humans and AI coding agents. Markdown files with YAML frontmatter, no database, no daemon.
Yaks gives you and your AI coding assistant persistent task tracking across sessions. Tasks are stored as markdown files (with YAML frontmatter for metadata) in a .yaks/ directory within your project — readable, diffable, and friendly to version control. Use it two ways: commit .yaks/ to share a tracker with your team, or gitignore it to keep a private, local-only scratchpad.
You work with the same .yaks/ files three ways: an interactive terminal UI (yaks tui), a read-only web board, and the CLI your agent drives. Yaks ships as a plugin for Claude Code and OpenAI Codex, as an Agent Skill for Zed and other skill-aware agents, and as a standalone CLI (on PyPI as yakherder) for anything else.
The yaks command is the tool itself — install it once and it's on your $PATH for the terminal UI and every subcommand. It's also what your agent calls.
The distribution is published on PyPI as yakherder; the command it installs is yaks (the name yaks was already taken on PyPI):
uv tool install yakherder      # puts `yaks` on your $PATH
yaks --help
yaks tui                       # the terminal UI
uv tool upgrade yakherder      # to update later
Prefer not to install anything? Run any subcommand in an isolated, throwaway environment (still just needs uv):
uvx yakherder tui # or: uvx yakherder init, uvx yakherder list, ...You can also install straight from source:
uv tool install git+https://github.com/joelgwebber/yaks
uv tool install /path/to/yaks # from a local cloneStep 1 gives you the tool. To have your AI agent drive it with the right workflow, add the Yaks skill/plugin for your editor. The skill teaches the agent the shave → shorn workflow and how to call the yaks CLI — it uses your installed yaks, or falls back to uvx yakherder if the command isn't on PATH.
The plugin/skill does not install the
yakscommand. It only teaches your agent to use it. If you want to runyaks/yaks tuiyourself (or want the agent to use an installed binary rather thanuvx), do step 1.
Claude Code
claude plugin add --from /path/to/yaks
The plugin bundles the yak and yak-tracker skills, which activate automatically when .yaks/ exists in a project.
OpenAI Codex
Yaks ships a .codex-plugin/plugin.json manifest. Install it from the Codex plugin browser, or point Codex at a local clone:
codex plugin marketplace add ./path/to/yaksZed and other Agent-Skills agents
Yaks ships skills/yak/ and skills/yak-tracker/, which follow the Agent Skills spec. Nothing here is editor-specific — any agent that reads Agent Skills can use them. Install globally via skills.sh:
npx skills add joelgwebber/yaksOr copy them manually from a local clone:
# Global (available in all projects)
cp -r /path/to/yaks/skills/yak         ~/.agents/skills/yak
cp -r /path/to/yaks/skills/yak-tracker ~/.agents/skills/yak-tracker

# Project-local (inside your project, requires a trusted worktree)
cp -r /path/to/yaks/skills/yak         .agents/skills/yak
cp -r /path/to/yaks/skills/yak-tracker .agents/skills/yak-tracker
The yak skill activates automatically when the agent detects a .yaks/ directory; yak-tracker relates yaks to external issue trackers as a one-way projection (rollup, import-once, outbound draft).
For agents without a plugin or skill (Cursor, GitHub Copilot, Gemini CLI, Windsurf, Aider, etc.), skip step 2 and point them at yaks with a context file instead — see Configuring your AI assistant. They call the same yaks CLI from step 1.
yaks init        # scaffold .yaks/ in the current project
yaks tui         # browse and manage tasks interactively
yaks init creates a .yaks/ directory (with hairy/, shaving/, and shorn/ subdirectories and a config.yaml) and appends a workflow mandate to AGENTS.md (or an existing CLAUDE.md; use --agents to force AGENTS.md). From there you drive tasks by hand in the TUI, and your agent drives them through the CLI.
- Status is a directory. A task in
.yaks/hairy/needs shaving. Move it to.yaks/shaving/and it's in progress. Move it to.yaks/shorn/and it's done. No status field in the YAML — the filesystem is the source of truth. - Tasks are markdown with frontmatter. Every task is a single
.mdfile. Structured metadata (ID, title, type, priority, timestamps, dependencies, labels) lives in YAML frontmatter. The markdown body is the description. - Parent/child tasks. Create subtasks with
--parent TASK_ID. Children get dot-suffixed IDs (yak-a1b2.1,yak-a1b2.2). The relationship is implicit from the ID — no extra YAML field.showdisplays the hierarchy automatically. - Dependencies are first-class. Tasks can depend on other tasks.
yaks nextshows only tasks whose dependencies are all shorn.yaks tangledshows what's stuck. - Artifacts. Attach files or clipboard images to tasks with
attach. They're stored in.yaks/artifacts/{task-id}/and linked from the task body. - Git-friendly. Task files are small, human-readable, and merge cleanly. Git history is your audit log.
- Local or team. Commit
.yaks/to share tasks with collaborators (team mode), or gitignore it for a private local-only scratchpad. In local-only mode, keep yak files — and their IDs — out of commits, PRs, and external trackers; the skill spells out the distinction so your agent doesn't leak private planning notes.
Three views over the same .yaks/ files.
The fastest way to browse and manage tasks by hand:
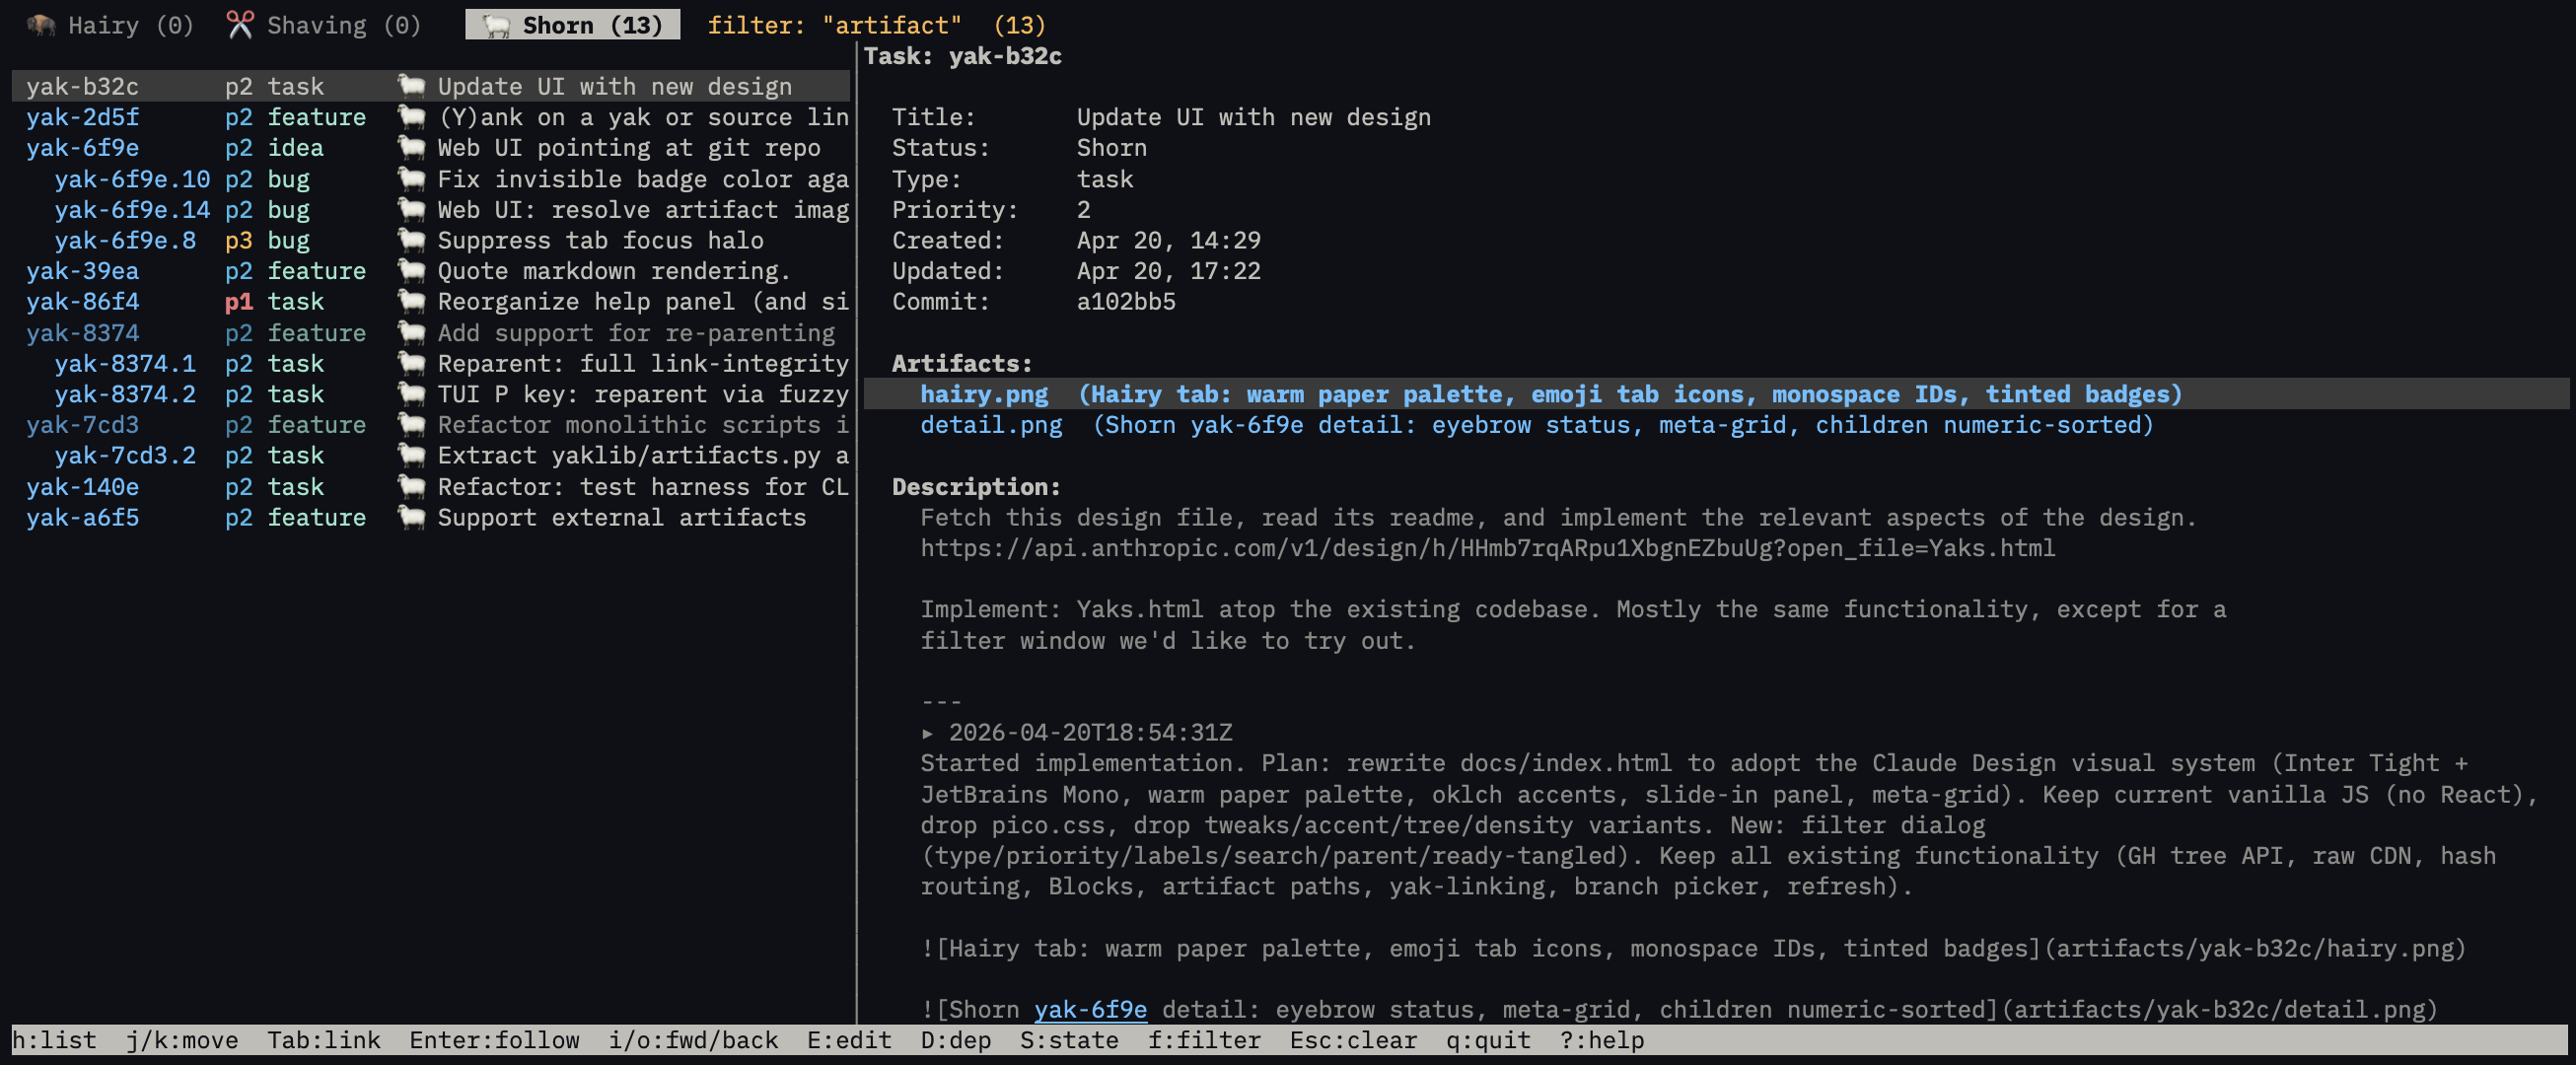
- Tab-based status views — switch between hairy, shaving, and shorn tabs
- Tree display — parent/child tasks rendered as a collapsible tree
- Detail pane — full task view with rendered markdown, metadata, dependencies, and artifacts
- Inline mutations — change status, priority, type, title, labels, and dependencies without leaving the TUI
- Filter drawer — drop-down filter panel (press
/for search,ffor the full filter) with live preview as you type - Help overlay — press
?for a full keybinding reference - Vim-style editing — optional vim keybindings in all text inputs (see Configuration)
A read-only web viewer for any repo's yaks, published at https://joelgwebber.github.io/yaks/:
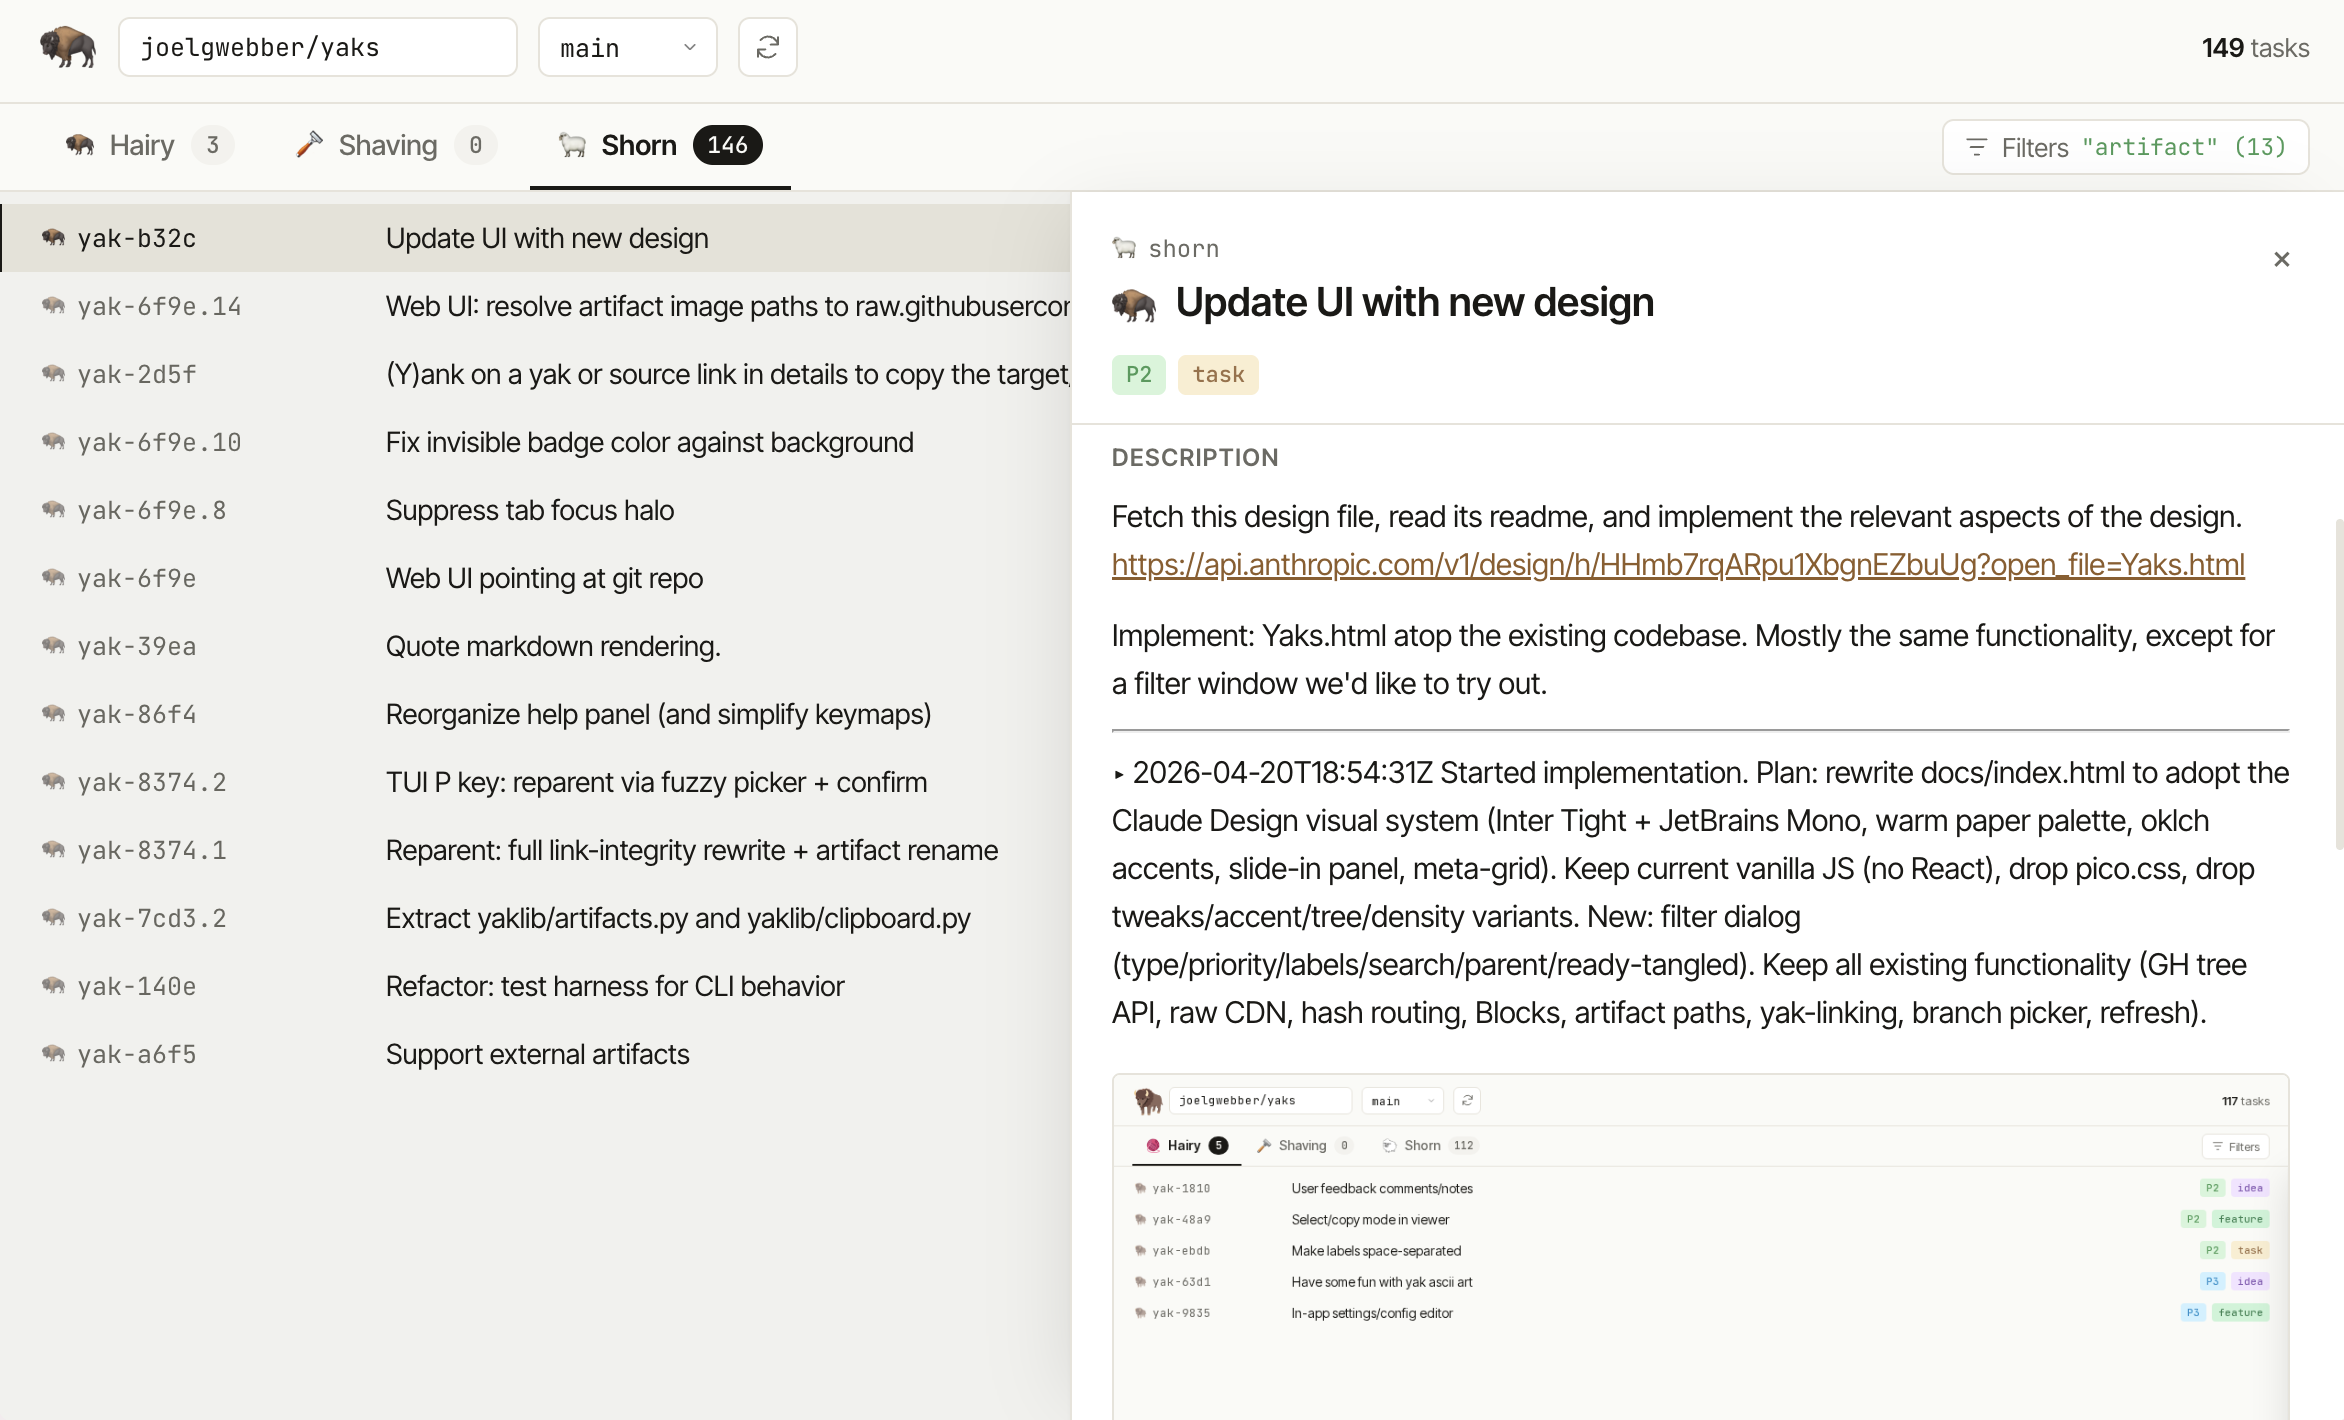
The hosted board defaults to this repo; type any GitHub owner/repo that has a committed .yaks/ directory into the top input to view its board. You get status tabs, the parent/child tree, per-task detail, and the same filters as the CLI and TUI. It reads public repos through the GitHub API — no install, nothing written back.
- Deep-link a specific board with a URL hash:
https://joelgwebber.github.io/yaks/#owner/repo(optionally.../#owner/repo/branch/tab/task-id). - Host it for your own repo: copy the single
docs/index.htmlfile into your repository (for example its owndocs/) and enable GitHub Pages frommain→/docs. Served fromhttps://<you>.github.io/<repo>/, it auto-fills your repo as the default in the top input.
(Source: docs/index.html, served via GitHub Pages.)
The CLI is what agents drive, and it's there whenever you want it directly. Every command accepts --json where applicable for machine-readable output.
| Command | Description |
|---|---|
yaks init |
Initialize .yaks/ in the current project |
yaks create |
Create a new task |
yaks list |
List tasks with optional filters |
yaks show |
Show full details of a task |
yaks update |
Update a task's fields |
yaks shave |
Start shaving a yak |
yaks shorn |
Mark a yak as shorn |
yaks regrow |
Regrow a shorn yak |
yaks slaughter |
Slaughter a yak (move to hidden dead/ state) |
yaks revive |
Revive a dead yak back to hairy |
yaks next |
Show yaks ready to shave (all deps met) |
yaks tangled |
Show tangled yaks (unshorn dependencies) |
yaks search |
Search tasks by keyword |
yaks dep |
Add or remove dependencies between tasks |
yaks reparent |
Move a task to a new parent or promote to top-level |
yaks stats |
Show task statistics |
yaks attach / yaks detach |
Attach or remove file/image artifacts on a task |
yaks rollup |
Group yaks by the external issue they roll up to |
yaks import-beads |
Import tasks from a beads JSONL export |
yaks tui |
Open the interactive terminal UI |
Example session:
yaks create --title "Add retry logic to API client" --type feature --priority 1
yaks shave yak-a1b2
yaks update yak-a1b2 --note "wired up exponential backoff"
yaks shorn yak-a1b2All query commands (list, search, next, tangled) share the same filter flags. Filters AND across dimensions; within a repeatable flag, values are OR'd:
--status S— filter by status (repeatable):hairy,shaving,shorn,dead--type T— filter by type (repeatable):bug,feature,task,idea--priority P— filter by priority (repeatable):1,2,3--label L— match any listed label (repeatable)--search Q— substring match on title, description, or id--ready— only tasks whose dependencies are all resolved--tangled— only tasks with at least one unresolved dependency--parent-of ID— only descendants of a given task
Examples:
yaks list --type bug --type feature --priority 1
yaks list --label auth --search retry
yaks next --type bugTasks are .md files with YAML frontmatter for metadata. The markdown body is the description.
---
id: yak-a1b2
title: Fix the login crash
type: bug
priority: 2
created: "2026-02-16T10:00:00Z"
updated: "2026-02-16T10:30:00Z"
depends_on:
  - yak-c3d4
labels:
  - auth
source: https://jira.example.com/browse/PROJ-123
---

Users see a crash on the login screen when
submitting with an empty password field.
Frontmatter fields:
- id — Auto-generated as
{prefix}-{4 hex chars}(prefix from config), or{parent-id}.Nfor child tasks - title — Short description of the task
- type —
bug,feature,task, oridea - priority —
1(highest) through3(lowest) - created / updated — ISO 8601 timestamps
- depends_on — Optional list of task IDs that must be shorn first
- labels — Optional list of string tags
- source — Optional URL linking to an external issue (Jira, GitHub Issues, Linear, etc.). Many yaks can roll up to one external issue;
yaks rollupgroups them, and a yak with nosource:inherits its nearest ancestor's.
Yaks reads configuration from two levels, with per-project values overriding user-global ones:
- User-global —
~/.config/yaks/config.yaml(created byyaks initif it doesn't exist) - Per-project —
.yaks/config.yaml
Available settings:
| Key | Default | Description |
|---|---|---|
prefix |
directory name | ID prefix for new tasks (e.g., api → api-f3a1) |
vim_mode |
false |
Vim-style insert/normal mode editing in TUI text inputs |
yaks init automatically appends a workflow mandate to your project's AGENTS.md (or an existing CLAUDE.md). Use --agents to force writing to AGENTS.md even when a CLAUDE.md is present.
AGENTS.md is the most portable choice — it's recognized by Claude Code, OpenAI Codex, GitHub Copilot, Gemini CLI, Zed, Cursor, Windsurf, and Aider without any extra configuration.
If you already have .yaks/ set up and want to add the mandate manually, add this block to your context file:
## Task tracking

This project uses Yaks. The Yaks skill has the full workflow.

1. Never start coding without a shaving yak. No exceptions.
2. Shear a yak as soon as its work is done. If the project commits its yaks (`.yaks/` is tracked by git), commit the shorn yak alongside the code that completed it; if `.yaks/` is gitignored, keep yak files — and their IDs — out of commits, PRs, and anything external.
3. Check existing yaks before creating new ones.
4. Append progress notes to yak descriptions as you work.
5. When unsure what's next, run `yaks next` — don't freelance.For agents that have their own context file convention, you can also create platform-specific files. Each file should contain the mandate above plus a note that the yaks CLI is available:
| Platform | File | Notes |
|---|---|---|
| Claude Code | CLAUDE.md |
Plugin handles skill injection automatically |
| OpenAI Codex | AGENTS.md |
Plugin handles skill injection automatically |
| GitHub Copilot | .github/copilot-instructions.md |
Highest-priority slot for Copilot |
| Gemini CLI | GEMINI.md |
Also read by Zed as a fallback |
| Cursor | .cursor/rules/yaks.mdc |
Use alwaysApply: true in frontmatter |
| Windsurf | .windsurfrules |
|
| Zed | AGENTS.md or install the skill |
Skill gives richer activation; see Install |
For Claude Code and Codex, the skill activates automatically when .yaks/ exists and carries the full workflow details, command reference, and task format documentation. The mandate block above is what ensures your assistant actually follows the workflow.
- Python 3.10+
- PyYAML (
pyyaml>=6.0) and prompt-toolkit (prompt-toolkit>=3.0.52, for the TUI)
Installing via uv tool install yakherder (or running uvx yakherder) pulls these in automatically into an isolated environment — nothing is added to your system or project Python.
Apache 2.0